So, you're looking to dive into the world of IoT SSH from anywhere free on Windows 10 command line? Let me tell ya, this is one of those game-changing skills that every tech-savvy person should know. Imagine being able to control your devices or access your server remotely without breaking the bank. That's right, no expensive software or fancy setups. Just pure command line magic on Windows 10. So, buckle up because we're about to take you through everything you need to know to get started.
Now, before we dive deep into the nitty-gritty details, let's set the stage. IoT SSH from anywhere free isn't just some buzzword—it's a practical solution for anyone who wants to manage their devices remotely. Whether you're a developer, a hobbyist, or even someone who just wants to tinker around with their smart home setup, this guide will help you harness the power of SSH without spending a dime. Plus, we'll make sure it's all done safely and securely.
And trust me, this isn't one of those overly complicated guides that leave you scratching your head. We're going to break it down step by step, making sure you understand every little detail. By the end of this, you'll be rocking your IoT SSH setup like a pro. Let's get to it, shall we?
Read also:Christina Ricci Warns Yellowjackets Fans About The Gruesome Season 3
What Exactly is IoT SSH and Why Should You Care?
Alright, let's start with the basics. IoT SSH stands for Internet of Things Secure Shell. It's basically a way to access and control your devices over the internet securely. Think of it like a secret tunnel that lets you communicate with your gadgets from anywhere in the world. And the best part? You can do all of this for free using the command line on Windows 10.
Why does this matter? Well, in today's world, having remote access to your devices is pretty much essential. Whether you're troubleshooting a server, managing a smart home system, or just checking up on your security cameras, IoT SSH gives you the flexibility to do all of that without being physically present. Plus, it's free! Who doesn't love saving money while staying tech-savvy?
Setting Up Your Windows 10 Environment
Now that we know what IoT SSH is, let's talk about setting up your Windows 10 environment. First things first, you're going to need the right tools. Luckily, Windows 10 comes with everything you need to get started. Just open up your command line and you're good to go.
Here’s a quick checklist of what you’ll need:
- Windows 10 installed on your computer
- Command Prompt or PowerShell access
- A stable internet connection
- A device or server you want to access remotely
Installing OpenSSH on Windows 10
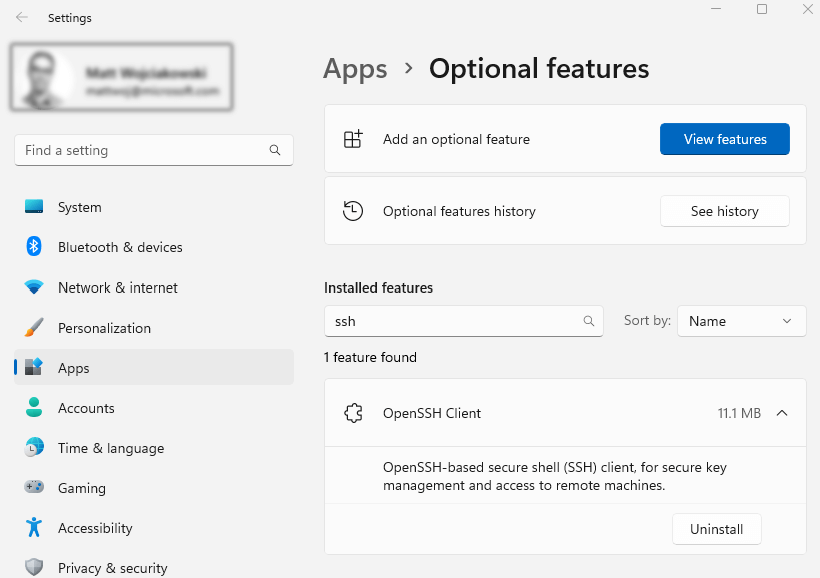
One of the first steps is to install OpenSSH on your Windows 10 system. Don't worry, it's super easy. Just head over to your Settings, click on "Apps," and then go to "Optional Features." From there, click on "Add a feature" and search for "OpenSSH Server." Hit install, and you're all set. Easy peasy, right?
Understanding SSH Keys and Their Importance
SSH keys are like the digital keys to your virtual kingdom. They provide a secure way to authenticate your connection without needing passwords. This is super important because it adds an extra layer of security to your IoT SSH setup. Plus, it saves you the hassle of typing in passwords every time you want to access your device.
Read also:Whoopi Goldberg Forgets Cohost Sara Haines Name On Live Tv The Honest Moment
Here’s how you can generate SSH keys on Windows 10:
- Open up your command line
- Type in "ssh-keygen" and hit enter
- Follow the prompts to create your key pair
Configuring Your SSH Server
Once you've got your SSH keys ready, it's time to configure your SSH server. This involves editing the SSH configuration file to allow key-based authentication. Don't freak out, it's not as scary as it sounds. Just open up your SSH config file using a text editor and add the following lines:
PubkeyAuthentication yes
AuthorizedKeysFile .ssh/authorized_keys
Save the file and restart your SSH server. Boom, you're done!
Connecting to Your IoT Device Remotely
Alright, now that everything is set up on your Windows 10 system, it's time to connect to your IoT device remotely. This is where the real magic happens. Using the command line, you can establish a secure connection to your device from anywhere in the world.
Here’s how you do it:
- Open up your command line
- Type in "ssh [your-username]@[your-device-ip]"
- Hit enter and voila! You're connected
Troubleshooting Common Issues
Of course, things don't always go smoothly. If you're having trouble connecting to your device, here are a few common issues and how to fix them:
- Make sure your SSH server is running
- Check your firewall settings to allow SSH traffic
- Ensure your device's IP address is correct
Securing Your IoT SSH Connection
Security is key when it comes to IoT SSH. You don't want some random hacker gaining access to your devices, do you? That's why it's important to implement some best practices to keep your connection secure.
Here are a few tips:
- Use strong, unique SSH keys
- Disable password authentication
- Regularly update your software and firmware
Using Port Forwarding for Added Security
Port forwarding is another great way to secure your IoT SSH connection. By forwarding a specific port on your router to your device, you can limit access to only authorized users. This adds an extra layer of protection and makes it harder for hackers to gain access.
Advanced Tips for Power Users
If you're a power user looking to take your IoT SSH game to the next level, here are a few advanced tips:
- Set up a dynamic DNS service to make your device accessible from anywhere
- Use SSH tunnels to securely access other services on your network
- Implement two-factor authentication for added security
Exploring Third-Party Tools
While Windows 10 provides everything you need to get started with IoT SSH, there are also some third-party tools that can enhance your experience. Tools like PuTTY and WinSCP offer additional features and functionality that can make managing your SSH connections even easier.
Conclusion: Taking Your IoT SSH Setup to the Next Level
And there you have it, folks! A comprehensive guide to accessing IoT SSH from anywhere free on Windows 10 command line. From setting up your environment to securing your connections, we've covered everything you need to know to get started. So, what are you waiting for? Dive in and start exploring the world of remote device management.
Remember, the key to mastering IoT SSH is practice. The more you experiment and tinker around with your setup, the more comfortable you'll become. And if you ever run into any issues, don't hesitate to reach out to the tech community for help. There's always someone willing to lend a hand.
So, what are you waiting for? Grab your command line, fire up your SSH server, and start controlling your devices from anywhere in the world. And don't forget to share this guide with your friends and fellow tech enthusiasts. The more people who know about IoT SSH, the better!
Thanks for reading, and happy hacking!
Table of Contents
- What Exactly is IoT SSH and Why Should You Care?
- Setting Up Your Windows 10 Environment
- Installing OpenSSH on Windows 10
- Understanding SSH Keys and Their Importance
- Configuring Your SSH Server
- Connecting to Your IoT Device Remotely
- Troubleshooting Common Issues
- Securing Your IoT SSH Connection
- Using Port Forwarding for Added Security
- Advanced Tips for Power Users
- Exploring Third-Party Tools

:max_bytes(150000):strip_icc()/command-prompt-windows-5820c6f73df78cc2e8961d0f.png)
